
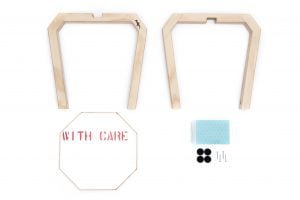
When I unbox a new coffee machine I want to be able to make my first cappuccino and not learn how to clean the machine, right? You would think so, but I regularly come across manuals and instructions that fail to keep it simple.
“Put the customer first! Improve the customer experience!” is today’s corporate mantra, so why do so many overlook the fact that the product instruction manual is a key touchpoint in that customer’s experience? And that certainly doesn’t mean starting the manual with a flood of legal warnings, recycling information and other irrelevant stuff.
Unfortunately most manuals are just boring technical product descriptions and the first thing which people throw aside after getting a rough idea of how the product works. I think this is a missed opportunity to inspire and inform your customers.
Let’s think about ‘Outside-In Instructional Design’. Put the customer’s needs, issue and tasks at the core of your instruction design and adding a bit of empathy into the mix.
This certainly isn’t a guarantee for success, but it does structure the process from the customers’ point of view. Here’s a quick run-down of the method we use at SwipeGuide
The action-oriented approach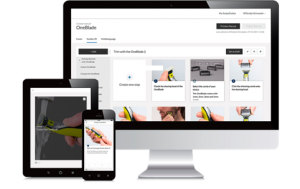
Our approach follows 5 clear stages:
1. Task Mapping
2. Break up tasks in steps
3. Information mapping
4. Visuals briefing
5. Guide production
Stage 1: Task mapping
We start with mapping & structuring tasks. Determine all things a user wants to do with a product. Brainstorm to find all relevant tasks and don’t worry, you can structure them later. Try to describe the tasks in an active way. It works well to combine a verb and noun, like “Replace shaving head”. If you use the terms familiar to users it will be easier for them to find the right instruction later. When you have listed all relevant tasks and subtasks you can start structuring them. This structuring includes grouping tasks into topics and sequencing the topics and tasks. You can use the Instruction Journey Map to analyse which tasks are relevant at which point in the journey. This helps to create a user guide with a logical sequence of tasks.
Stage 2: Break up tasks in steps
Once you have the whole task structure mapped out you can start to define the steps per task. Every task consists of a series of steps that a user needs to take in order to get from the “initial state” to the “desired state”.
You also need to write steps in an active way. Be directive and address the user. “Press the release button on the back of the shaving head”, is an example of this. Again use a verb and a noun and point the user in the right direction. Try to avoid combining 2 steps in 1. This is confusing for users. If a task has too many steps think of ways to break it up. Also avoid adding information at this point. Just focus on the right description of each step. We’ll add information blocks in the next stage.
Stage 3: Information mapping
When defining the steps you will find there are points when you want to add information. But while you needed to be concise and minimalistic in Stage 2, you may now add extra information.
To make information easy for users to understand, we use information mapping. This means using easily recognisable information blocks that you can add to each step. SwipeGuide offers the following blocks: Tips, Warnings, Alternative Routes and Error Fixes.
✓ Tip: information that is not critical, but can help users to perform the step in a smart way. For example: “Make sure you charge the shaver 100% before first using”.
✓ Warning: information that points to a specific hazard in a step. For example:”Keep the adapter dry at all times”.
✓ Alternative Route: information that shows a different way of taking the step. For example: “You can also use the shaver for wet shaving in the bath or shower”.
✓ ErrorFix: handles a specific issue that can occur during the step and offers a solution. For example: “Issue: The shaving head doesn’t come off. Reason: there might be some dirt on the edges. Solution: clean the shaving head with water and try again”.
Add these pieces of information where needed. Limit yourself and do not overload users with information. Put the information blocks at the points where they add value for the user. For instance at points where you know mistakes or risks occur.
Stage 4: Visuals briefing
This stage is critical: the visualisation of the steps. Visualisation is key for guiding the customer to best use your products. This information underlines the tasks and steps described in Stage 2, by showing users how to perform them. You can do this with illustrations, photos, animated GIFs or micro- videos. Illustrations are the most abstract visual form and microvideo the most detailed.The nature of a step can sometimes dictate the form or design of a visual. Each form has its own characteristics and benefits. If you want to learn more details about which visuals to choose and how to produce them, please reach out to us and we’ll send you our visualisation tips & tricks.
Stage 5: Guide production
When you have all the textual and visual content ready, you can start producing your user guide or assembly guide.
A user guide is a collection of step-by-step instructions grouped into topics. An instruction covers a single task and consists of a series of steps. When creating a full user guide you start by identifying all the topics and the task structure. Next you create the instructions and add the steps and information blocks. At SwipeGuide we’ve created an intuitive software platform that enables you to design, create and publish your user guides very easily.
Because the platform publishes user guides instantly to a mobile and a desktop app it allows you to track several analytics about your instructions. Your customers can give feedback on your instructions which you can use to improve them. Making your user manual an effective tool for improving customer product experience.
We believe using this method to create user-centred instructions is a way to improve your product experience. To be er help and engage your customers, from unboxing and getting started through troubleshooting to finally recycling. If you agree or even be er, if you disagree, we’d love to hear from you at [email protected]


